A dataset of videos, used for computer vision tasks, could be the key to success or failure. A clean dataset could lead the way to a great algorithm, model and ultimately system, while no matter how good the model or algorithm is, garbage in – garbage out.
How will you find the most relevant frames to the current task from your dataset?
Moreover, if the object in question is small, could you find a diverse set of frames that show that object?
How to Search in a Video
Data Explorer is a platform that was built to allow us focus on the data, curate it, clean it and make sure we start the development cycles with a great foundation.
In a previous blog, we saw how Data Explorer visualized video clips and split them into scenes. Then, we could use image-based-search to search for specific frames, or even to mark a small patch, or ROI (region of interest), and search for frames that display them.
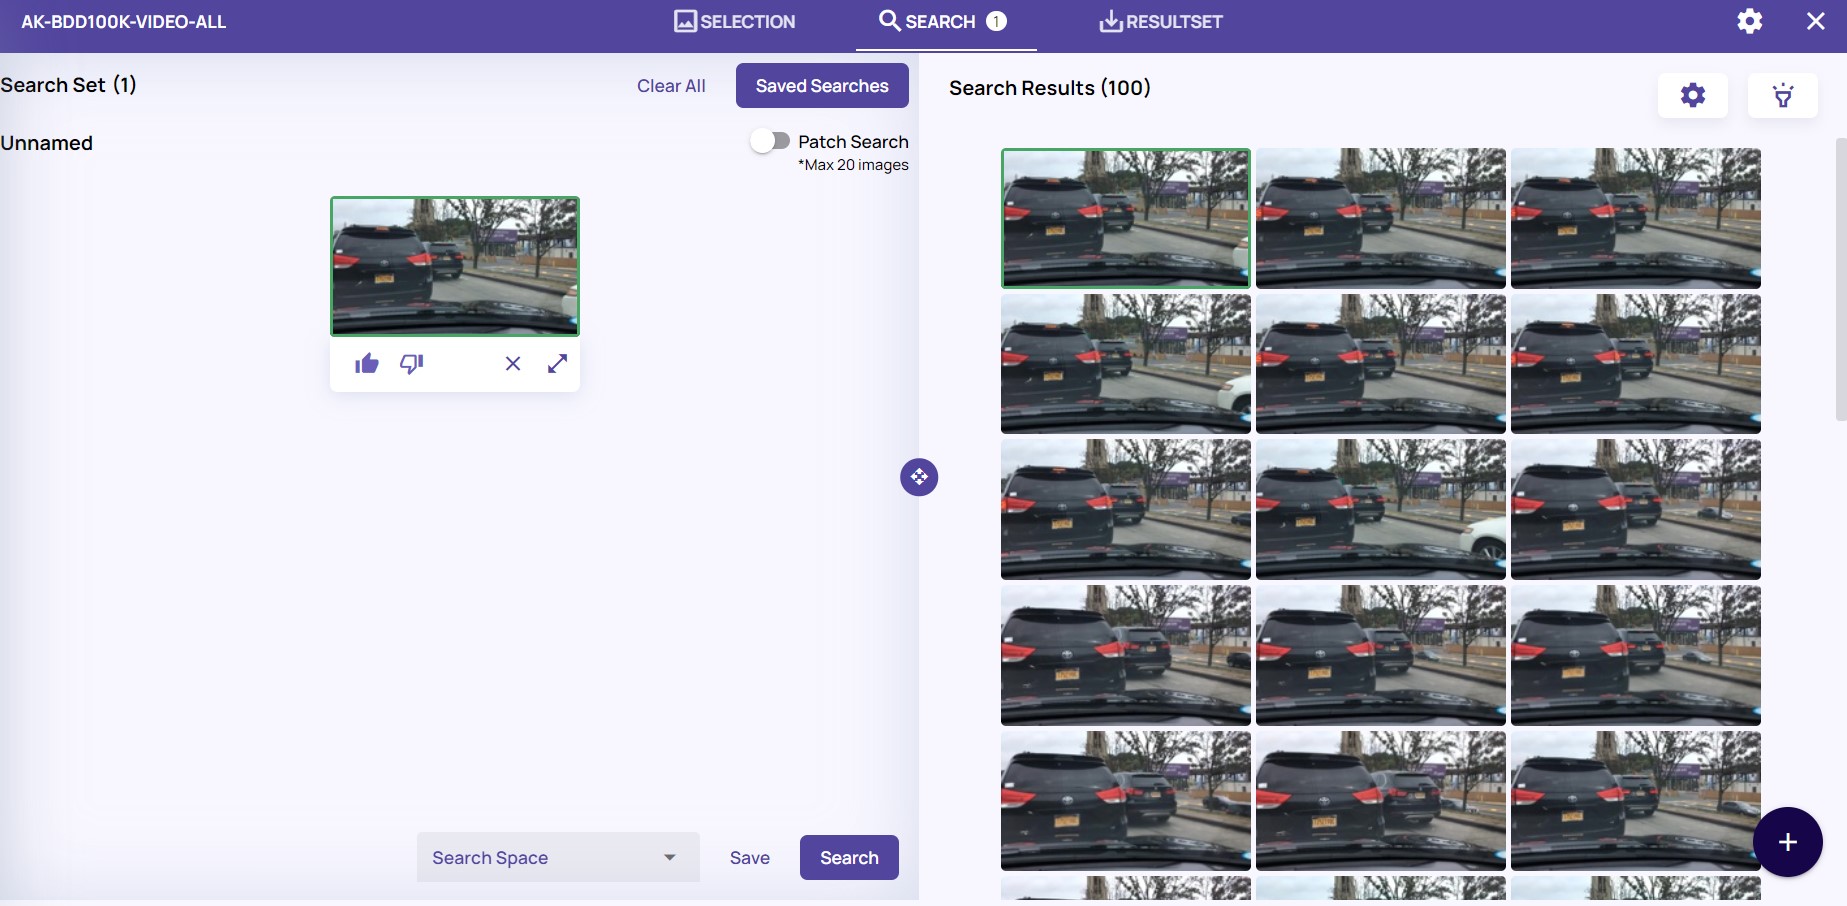
So, let’s say we detected a relevant frame and we wanted to find frames that were similar to it — what would we find? the frames adjacent to the chosen frame of course.
The image below is a clear example of this result — we marked a frame with a vehicle and hit the “search” button. Adjacent frames are clearly seen on the right side:

Searching for a frame in a video show adjacent frames from a narrow time range
Click the “flashlight” icon to view where the results are coming from:

Search results’ locations are marked on the full video sequence
So what can be done?
You could increase the result size — instead of the first 100, review the first 1000, or 10K frames.
You could, but there is a better way!
Data Explorer provides multiple options to sample the dataset — a complete overview is provided in a previous blog. Sampling the dataset could be very useful to reduce the training images, reduce annotation cost and speed up the training cycles.
Sampling the dataset also allows searching in a much wider range of scenes. trying the different sampling methods will increase the chances of searching at different scenes, while not overlooking others.
In our example, the Coreset method was chosen, keeping 40% of the data — as seen in the image below:

Sampling the dataset using Coreset method, keeping 40% of the frames
Next, re-running the Search option, looking at the sampled data, as seen in the image below:

Re-applying Search on the sampled dataset
In the example above, we can easily see that starting from the third row, new results appear, as oppose to the first attempt, where is was all the same scene. The “flashlight” icon provides further reassurance:

New search results’ locations are marked on the full video sequence
For visualization, below are both “flashlight” results side by side — the diversity and spread on the right side is unmistakable:

Left — original search; Right — search on sampled data. Right search results are more diverse and spread out.
This flow, which can be completed faster than reading this blog, allows you to search for frames in different parts of the video. By reviewing these results, you could focus on potential specific scenes or parts of scenes, further developing and curating the examples for the task at hand.
The same process could be applied with activating the Patch search option — see the toggle button on the top of the first image, to marks an area and search based on it.
Summary
In this blog, we saw how to perform an image based search or a patch based search in a video, and increase the chances of finding results in different scenes. This will increase the diversity of your data, which should improve the accuracy of your algorithm, model, and system.
In future posts, we will see how else videos could be curated by Data Explorer.


No Responses