Unlocking the full potential of your dataset is crucial for successful computer vision tasks. Whether you’re developing an algorithm, training a model, or refining a system, the quality of your dataset can make all the difference. A clean, well-curated dataset leads to better outcomes, while poor data management results in the classic problem: garbage in, garbage out.
So, how do you find the most relevant images for your specific task from a massive dataset?
You could take the manual route—annotating every image, leveraging metadata, or sifting through the data hoping to strike gold. However, for large or repetitive tasks, this approach is time-consuming, expensive, and often inefficient.
There’s a better way—Image-Based Search.
The Power of Image-Based Search with Data Explorer
Enter Data Explorer, a platform designed to help you focus on what truly matters—your data. It allows you to curate, clean, and optimize your dataset, providing a strong foundation for development cycles.
In previous discussions, we explored how datasets could be visualized and analyzed. Now, let’s dive into another powerful feature of Data Explorer: image-based search. This tool enables you to search your dataset for images similar to a specific example, without relying on metadata or prior knowledge.
For demonstration, we’ll use the SDNET dataset of surfaces. The process begins with visualizing the dataset and selecting an image of interest. By right-clicking on the image and marking it with a ‘thumbs up’ icon, you initiate the search for similar images.
How to Perform Image-Based Search
Once you’ve marked one or more images, navigate to the ‘Search’ tab and click the ‘search’ button. Data Explorer will then find images similar to your chosen example.
If you’re not satisfied with the initial results, you can refine the search further. Add more images that meet your criteria or remove those that don’t by marking them with a “thumbs down.” This iterative process allows you to zero in on the most relevant images quickly and efficiently.
For example, starting with a dataset of 25,000 images, you can narrow down to a few key examples within minutes—saving time and resources.
Data Explorer also includes a handy ‘flashlight’ feature, which shows you the source of the found images within the dataset. This helps you understand the context and distribution of your data, making it easier to target specific areas for further exploration.
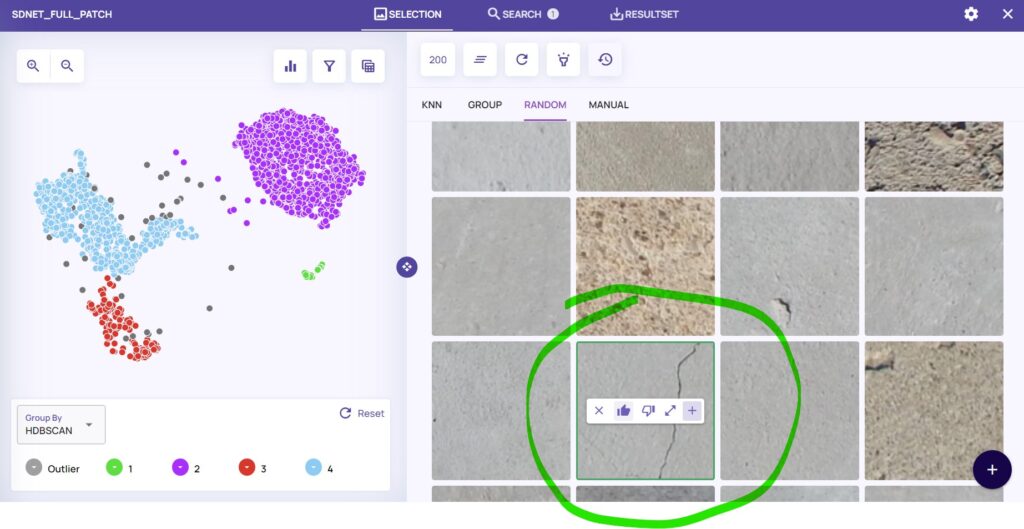
Visualization of the SDNET dataset and marking an example to search
Once one, or more, images were marked, go to the ‘Search’ tab and click the ‘search’ button to find similar images:
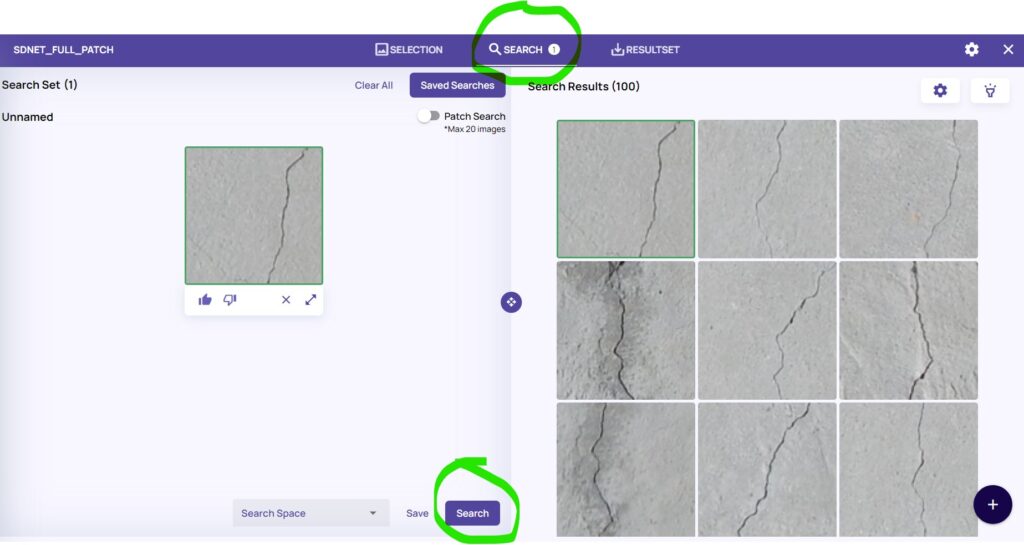
Search the dataset for images that are similar to a chosen example
A search can be refined further by adding more examples to look for but also by removing undesired images. In the image below we mark an example with a “thumbs down”:
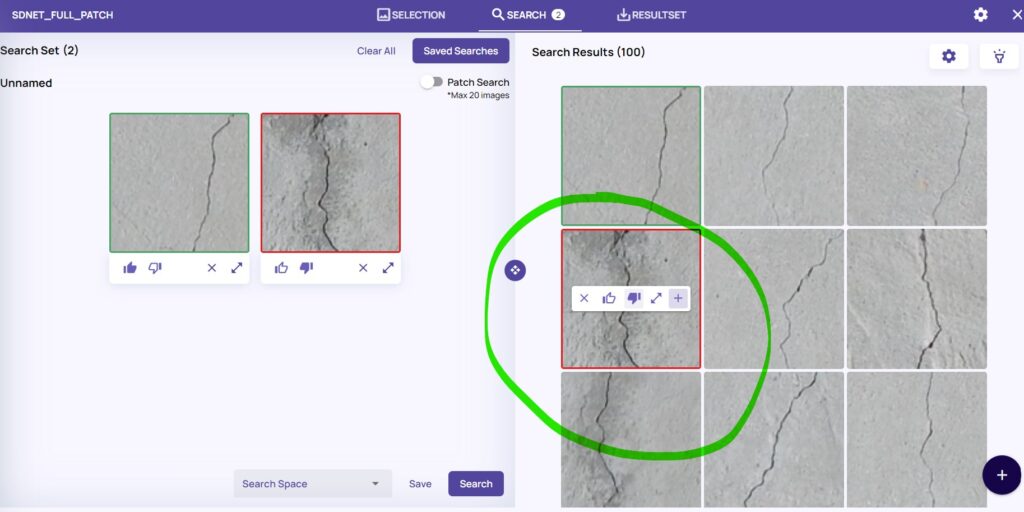
Improve the search results by removing undesired examples
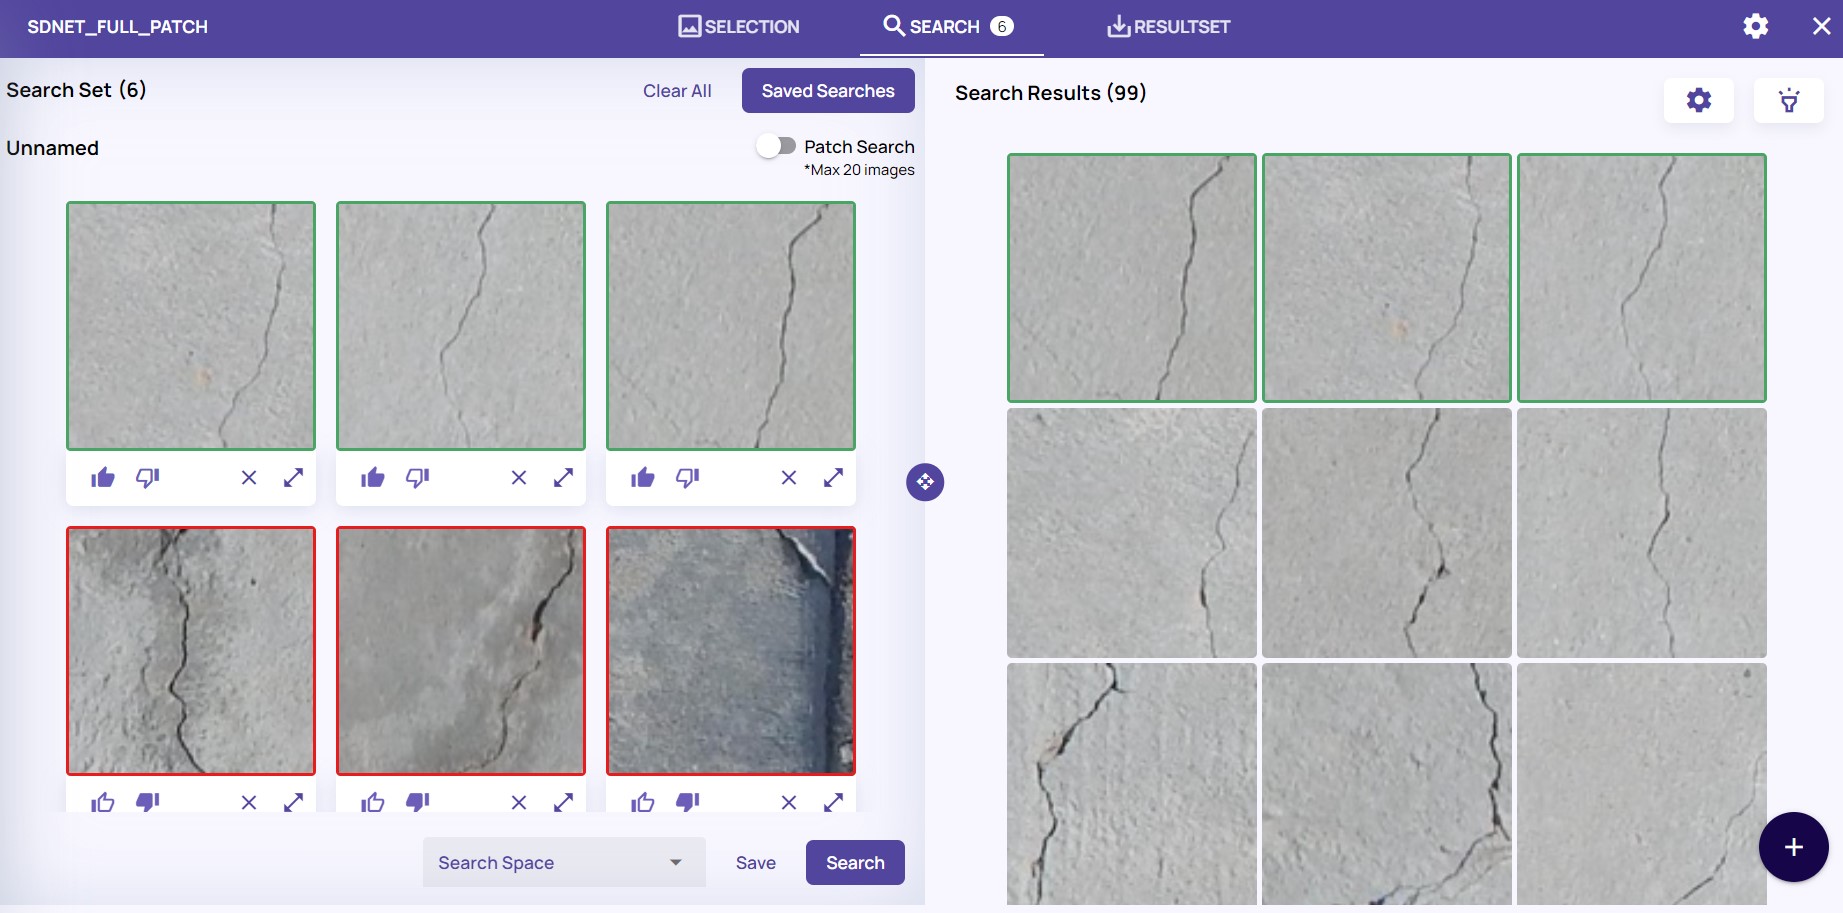
This process can be repeated several times, as in the image below:

Refining the search with more desirable and undesirable examples
After starting with a dataset of 25K images, within a few minutes you have found a few examples to continue development on.
More over, using the ‘flashlight’ icon, we can see where the images are coming from within the dataset:
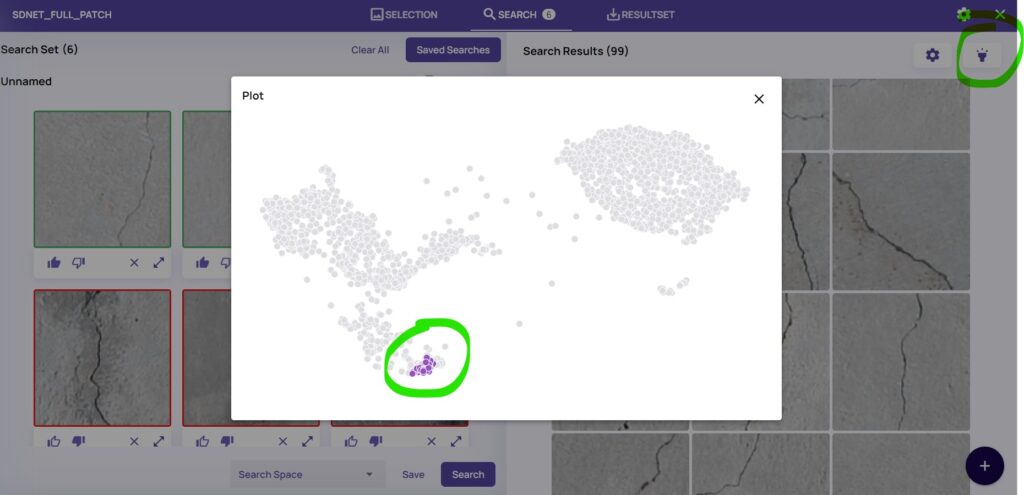
Use ‘flashlight’ to view source of found images
As a next step, you could explore the marked area in the above image further, and search only it for more examples.
Image based search is great to find examples within a large and diverse dataset of images.
Taking Image-Based Search Further with Patch Search
But what if the object of interest is small and might not be prominently represented in the feature vector? Data Explorer has you covered with its Patch Search capability.
Patch Search allows you to mark a specific region of interest (ROI) within an image and search based on that area alone. This feature is particularly useful for finding small but significant objects within large images.
The user interface and workflow are similar to full image search. Simply activate the toggle button at the top, reveal a grid over your images, mark the relevant area, and click ‘quick search’ or ‘search.’
For instance, consider searching for crosswalks in the BDD dataset of dashcam footage. A general image-based search might return urban scenes, but by using Patch Search to focus on the crosswalks (highlighted in yellow), you get highly accurate results.
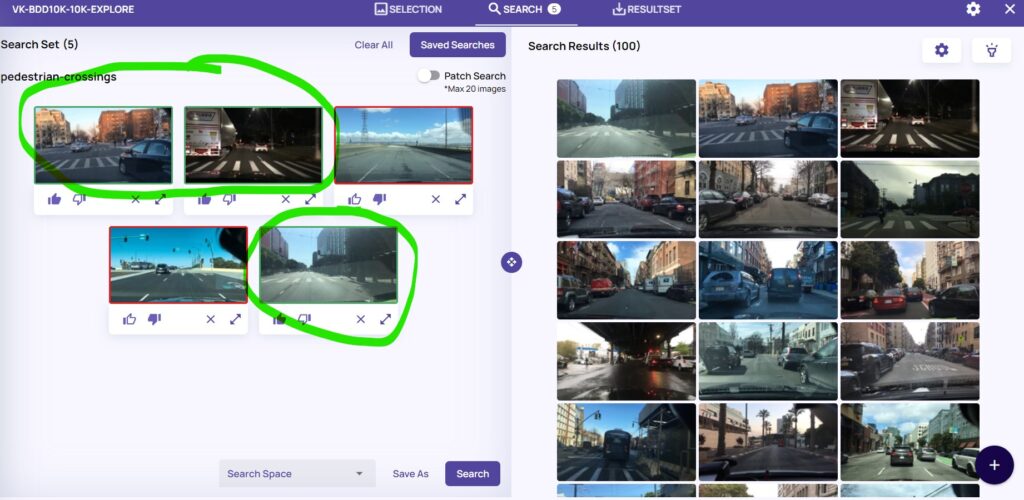
Searching for ‘crosswalks’
Activating patch search, marking the crosswalks (note the yellow markings) and searching, results are excellent:
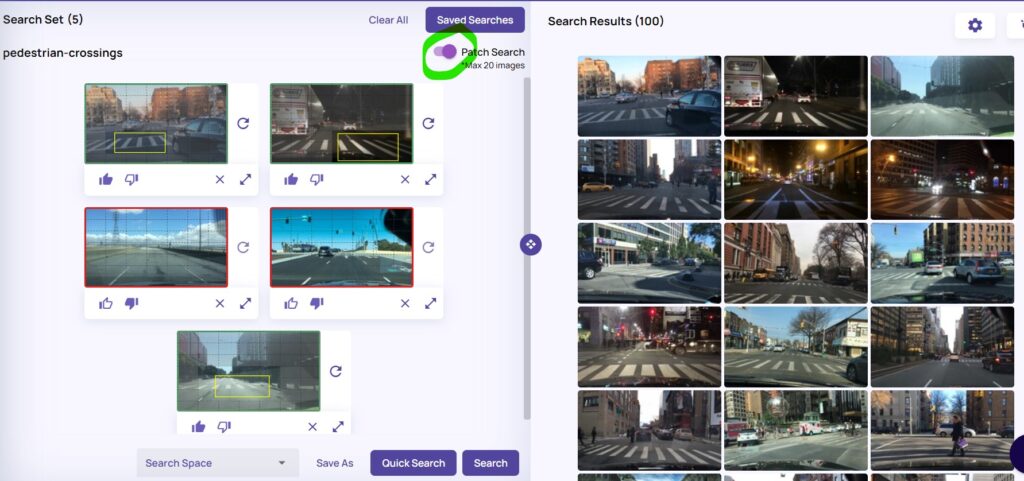
Searching for ‘crosswalks’ using Patch search — excellent results
Summary
In this blog, we explored how Data Explorer enhances your dataset optimization through image-based and patch searches. These tools allow you to quickly identify and curate the most relevant data from large datasets, ensuring that your data is clean, focused, and perfectly suited for your development needs.
Stay tuned for future blogs, where we’ll delve into further optimization techniques and show you how Data Explorer can be used to analyze training results.


No Responses